2 week project - I kept having to stop and start with customer orders in between...
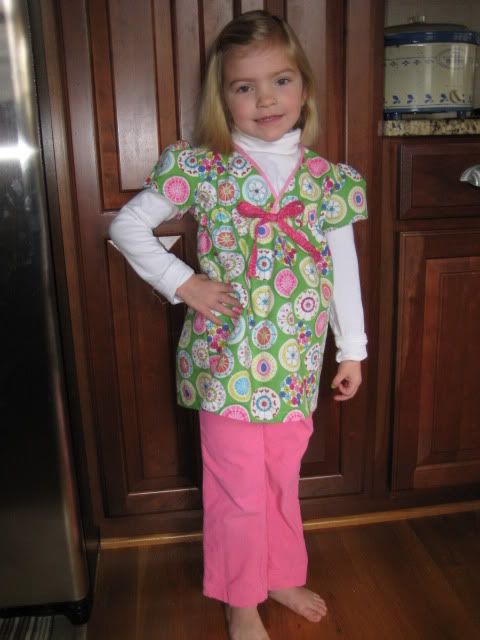
Handmade blouse in a lovely "Lava Bloom" fabric by Michael Miller.
This is a 4T, sewn with 1/4 in. seam allowances rather than the 5/8 in the directions. She is 4 so I was scared it wouldn't fit after I cut it out and looked at it. But it does! I never make a muslin of something first - I guess that I should. Does everybody else do that?
I used a McCall's M5794.
I have made the top and the pants before and they are both great.
About this style:
There is an elastic casing around the bodice. The neck opening is wide enough for their head to slip into. So because it is a woven fabric and doesn't stretch, this pattern really works as a blouse with no button placket. That yellow piece shown on the pattern picture is an additional tank top made with this pattern. I did not make one. We will just wear a shirt we already own underneath.
I was really afraid it was going to look like scrubs when it was all finished. Because actually that is what my husband said it looked like! Bless him for being so honest. But this is just one of those garments that don't look cute on the hanger, but look much better on a person. I think it was because of the green fabric with the pink bias tape around the neck opening. Scrub-like.
But actually I really like it and I would make it again.
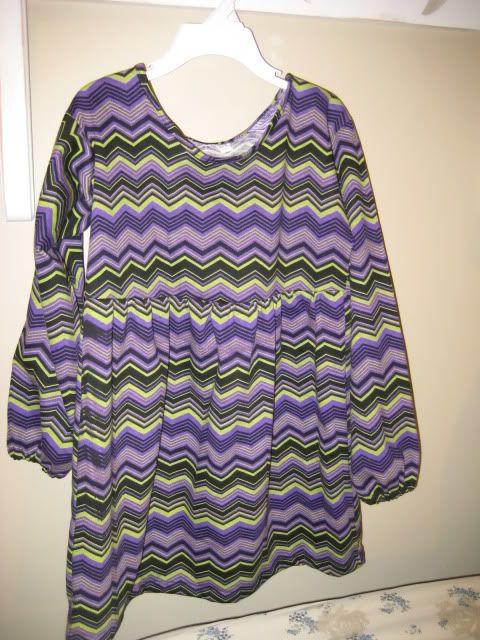
I got ready to sew a knit top for my daughter out of this awesome zig zag patterned fabric from the Fabric Fairy.
I ordered it back in the Fall.
Yeah, just now getting to it.
Anyway, I had this neat pattern from Burda that I was going to use. I lay it all out and discover that, duh!, I need wayyy more fabric than the one yard that I had. Just for a girls size 10 top.
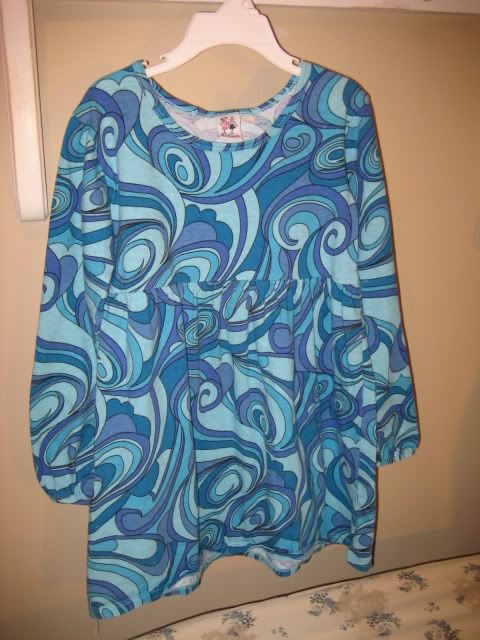
So that did it! I had been wanting to copy a top she already has from Girlfriends by Anita G forever. I got it at market in Atlanta and it is by far our favorite top ever!
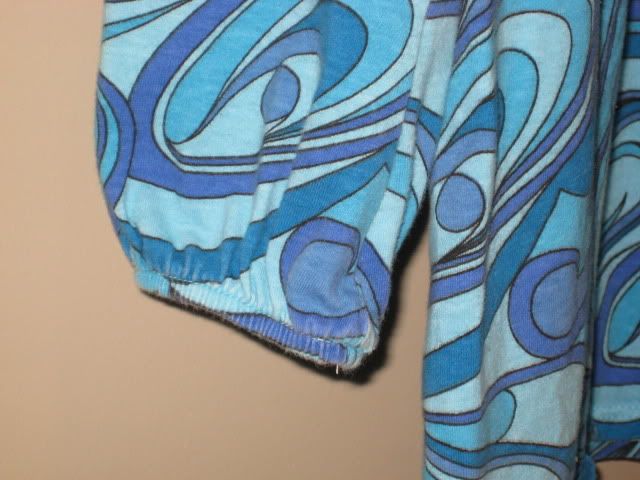
It is babydoll style with elastic at the end of the sleeves. So cute!
Here's our version:
Not too shabby!
I have to admit that it does have a few flaws. I didn't do a "right" and "left" sleeve. So one sleeve's seam is on the top and one sleeve's seam is on the underside. Oh well!
And the seam across the gathered part in the front could have matched up with the pattern a little better.
But I'm just so happy I figured it out.
Now I have a pattern made for a size 8. I'll be making one or two more before the cold is over, I hope.
these beautiful batiste gowns are perfect for your newborn baby.
This tutorial will show you how to make one of these fast and easy.
You could also use this to make an older girls babydoll-style top or dress using a onesie or t-shirt.
Like this one:
Although the ric-rac detail is not in the tutorial, you can add that as well.
Of course, everything looks better with an applique or monogram. If you can't do it, take your finished top to the monogrammer.
This tutorial is great because you don't need to know how to sew buttonholes (there aren't any). You don't need a lot of supplies. If you can sew a straight line, or approximately, you can do it.
The technique of gathering fabric is required and if you do not know how, then this will teach you. It requires a little bit of patience, but you can't mess up. Therefore it's totally do-able!
For the Infant Gown you will need:
45" inch width fabric - about 1/2 yard (I used batiste)
Store-bought onesie
Water erasable marker
Seam ripper (in case you lose your gathering threads)
Lay out fabric with cut edges north and south, selvage edges east and west. You should have 18 inches of fabric from cut edge to cut edge.
Fold in half meeting selvage edges and cut at fold.
Now you have 2 pieces of fabric the same size. They should each measure about 18 in. X about 23 in. wide. Place them on top of each other with the right sides of fabric facing each other.
Sew the side seams using a 1/4 inch seam allowance.
5. If desired, serge or zig zag stitch along the side seams after sewing. Press seams open.
6. Also, if desired, serge along the top edge of gown fabric to make a finished edge. Just through a single layer of fabric to seal the raw edge. This is not required to have a nice dress. :)
7. For this step make sure your bobbin thread ends and top thread ends are out from machine about 5 inches. Stitch a loose gathering stitch along top edge of dress, using a wide stitch setting (mine is 4 mm) and loose tension. Do this at about ¼ inch away from edge of fabric. You could start at one side seam and end near the other side seam. When doing so leave long threads on either side of stitching at side seams. In other words, don't snip it close to the fabric. Gather fabric evenly to fit onesie. Do so by grasping bobbin thread on either side of seam and pulling gently along gathering stitches. Do this until it fits the width of one side of onesie. Hold the fabric you are gathering up to the onesie’s width to check and see if it is getting that size. When sewing down on onesie you can always gather up again when getting close to the side seam.
8. Using a water erasable marker, mark the placement for seam of gown fabric onto onesie two centimeters below underarms of onesie. Do dots across front and back to use as a guideline to place dress fabric against.
9. Placing onesie under presser foot: With onesie right side out, with neck opening end at left, slide onesie under presser foot at any spot you want to start with. (preferably a side seam). Make sure the sewing machine arm is inside the onesie.
10. Fabric “skirt” will still be wrong side out. Carefully place fabric to left of presser foot with bottom edge of skirt to your left. Tuck sleeves and neck of onesie inside skirt. If care is not taken, the gathering might become uneven. Match side seam of skirt to onesie side seam. Begin stitching on top of gathering stitches matching the skirt top edge to the dots made on onesie. The skirt will be inside out and the onesie will be right side out. Take care notto stretch onesie while sewing. Carefully guide the fabric along the dots.
11.Begin stitching around the onesie.
12. When finished turn right side out and check seams.YOU'RE ALMOST DONE!
Finish bottom hem: With gown fabric wrong side up, fold bottom edge of skirt over 1/4 inch. Press. Then fold over again as much as you would like (I would do about 2-3 inch). Then stitch. Your hem is now finished and so is your dress. Clip threads and voila!
To make an older girls baby doll style top use this tutorial the same way using a onesie or t-shirt.
Make adjustments only to the length of fabric used. You can still use the same width of a 45" piece of fabric.
Just measure your child from the underarm down to where you want the top or dress to fall.. Add to the length 1/4 inch for the top seam and about 2 inches for the bottom hem. You can even add a ruffle to the bottom hem using the same gathering technique. Use 2 strips of fabric 45" wide and about 3-4 inch long. Finish the hem on each strip and then do your gathering along the top edge. Then attach to the unfinished hem of fabric already sewn onto t-shirt.
One of my friends and customers wanted her daughter to have a matching outfit with her American Girl doll as a Christmas gift.
We decided on a matching peasant top and doll denim.
It turned out really cute and maybe, just maybe I can get some done for my own little model and her own doll too! (Before Christmas, that is.)
My mom ordered these from me: linen tip towels monogrammed for her friends.
Also I'm giving these kitchen towels as a gift to my aunt in Philadelphia. Her kitchen was just renovated and these will be perfect!
My daughter's music teacher was given this linen towel for her teacher gift (done by me).
These are teacher gifts also. Could not get this image to flip!!!
I had to add something about these cute little jello jiggler bears I made for my daughter's preschool Christmas lunch. They looked like big gummi bears. Here's one of them.
My 8 yr. old daughter in her new refashioned Alabama Crimson Tide tee shirt.
She doesn't like the ruffle! I am so shocked. She's such a girly girl.
Her dad liked it and told her she would be wearing it anyway. Bless his heart, he knows how hurt I get when she disses my work!
She didn't mean to be critical, but just didn't know if she liked the ruffle or not. I told her it made her look like an older girl. That may work!
I love how it looks on.
She's ready for the game this Saturday. It will be her first time to go inside Bryant-Denny Stadium. Yay!
I decided she should have a new complete outfit to wear to the game so I will be working on that from now until Saturday. I'll post pictures after the weekend!






 Posts
Posts


