Featured in my shop Sara Says Boutique,
these beautiful batiste gowns are perfect for your newborn baby.
This tutorial will show you how to make one of these fast and easy.
You could also use this to make an older girls babydoll-style top or dress using a onesie or t-shirt.
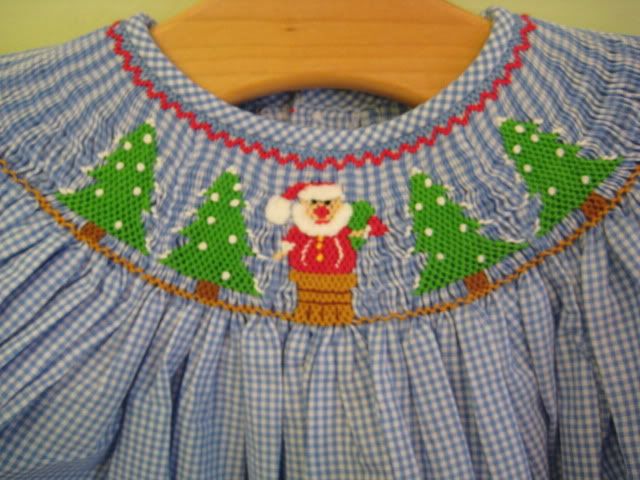
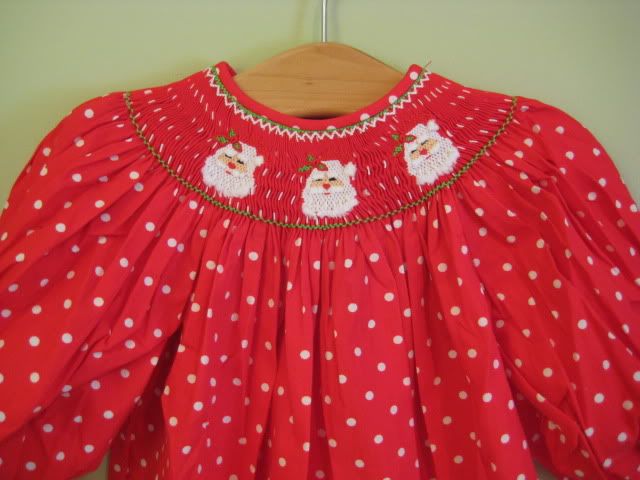
Like this one:


Although the ric-rac detail is not in the tutorial, you can add that as well.
Of course, everything looks better with an applique or monogram. If you can't do it, take your finished top to the monogrammer.
This tutorial is great because you don't need to know how to sew buttonholes (there aren't any). You don't need a lot of supplies. If you can sew a straight line, or approximately, you can do it.
The technique of gathering fabric is required and if you do not know how, then this will teach you. It requires a little bit of patience, but you can't mess up. Therefore it's totally do-able!
For the Infant Gown you will need:
- 45" inch width fabric - about 1/2 yard (I used batiste)
- Store-bought onesie
- Water erasable marker
- Seam ripper (in case you lose your gathering threads)
- Lay out fabric with cut edges north and south, selvage edges east and west. You should have 18 inches of fabric from cut edge to cut edge.
- Fold in half meeting selvage edges and cut at fold.
- Now you have 2 pieces of fabric the same size. They should each measure about 18 in. X about 23 in. wide. Place them on top of each other with the right sides of fabric facing each other.
- Sew the side seams using a 1/4 inch seam allowance.

5. If desired, serge or zig zag stitch along the side seams after sewing. Press seams open.
6. Also, if desired, serge along the top edge of gown fabric to make a finished edge. Just through a single layer of fabric to seal the raw edge. This is not required to have a nice dress. :)
7. For this step make sure your bobbin thread ends and top thread ends are out from machine about 5 inches. Stitch a loose gathering stitch along top edge of dress, using a wide stitch setting (mine is 4 mm) and loose tension. Do this at about ¼ inch away from edge of fabric. You could start at one side seam and end near the other side seam. When doing so leave long threads on either side of stitching at side seams. In other words, don't snip it close to the fabric. Gather fabric evenly to fit onesie. Do so by grasping bobbin thread on either side of seam and pulling gently along gathering stitches. Do this until it fits the width of one side of onesie. Hold the fabric you are gathering up to the onesie’s width to check and see if it is getting that size. When sewing down on onesie you can always gather up again when getting close to the side seam. 


8. Using a water erasable marker, mark the placement for seam of gown fabric onto onesie two centimeters below underarms of onesie. Do dots across front and back to use as a guideline to place dress fabric against.

9. Placing onesie under presser foot: With onesie right side out, with neck opening end at left, slide onesie under presser foot at any spot you want to start with. (preferably a side seam). Make sure the sewing machine arm is inside the onesie.

10. Fabric “skirt” will still be wrong side out. Carefully place fabric to left of presser foot with bottom edge of skirt to your left. Tuck sleeves and neck of onesie inside skirt. If care is not taken, the gathering might become uneven. Match side seam of skirt to onesie side seam. Begin stitching on top of gathering stitches matching the skirt top edge to the dots made on onesie. The skirt will be inside out and the onesie will be right side out. Take care not to stretch onesie while sewing. Carefully guide the fabric along the dots.

11.Begin stitching around the onesie.
12. When finished turn right side out and check seams.YOU'RE ALMOST DONE!
Finish bottom hem: With gown fabric wrong side up, fold bottom edge of skirt over 1/4 inch. Press. Then fold over again as much as you would like (I would do about 2-3 inch). Then stitch. Your hem is now finished and so is your dress. Clip threads and voila!
To make an older girls baby doll style top use this tutorial the same way using a onesie or t-shirt.
Make adjustments only to the length of fabric used. You can still use the same width of a 45" piece of fabric.
Just measure your child from the underarm down to where you want the top or dress to fall.. Add to the length 1/4 inch for the top seam and about 2 inches for the bottom hem. You can even add a ruffle to the bottom hem using the same gathering technique. Use 2 strips of fabric 45" wide and about 3-4 inch long. Finish the hem on each strip and then do your gathering along the top edge. Then attach to the unfinished hem of fabric already sewn onto t-shirt.